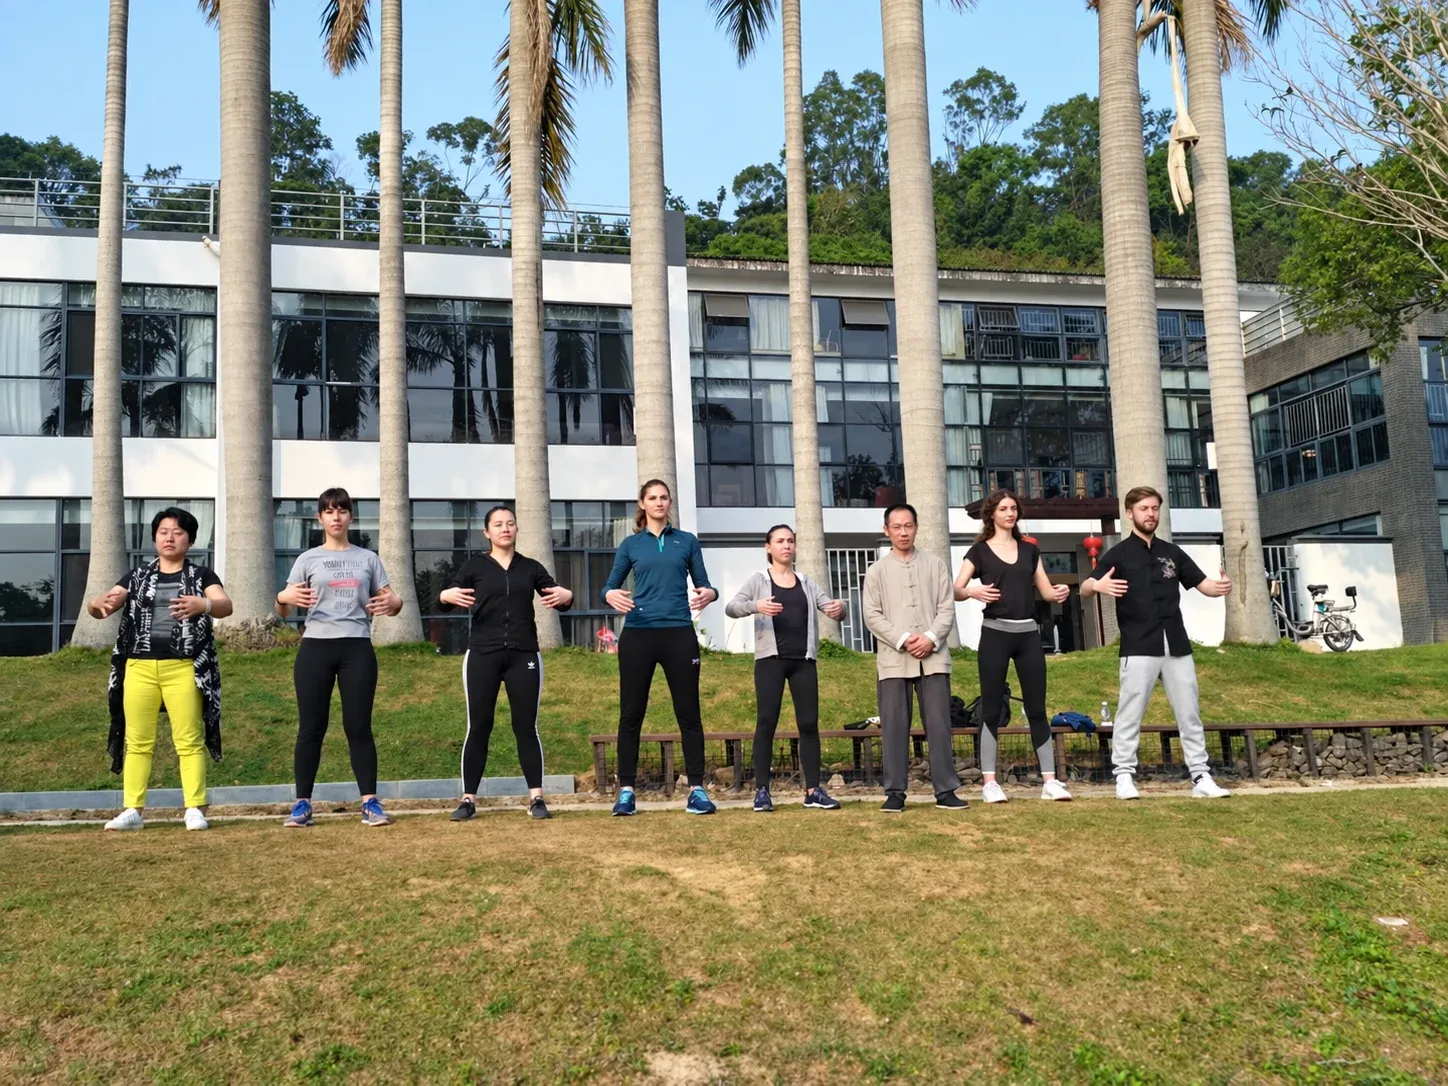
Take a look at a practice session. Press play when you’re ready.
01 / Learn Zhan Zhuang
New to standing meditation?
Understand the practice before trying to hold the pose
Standing practice
Zhan Zhuang may look like someone simply standing still. In practice, you are learning how posture, attention, intention, and support from the ground relate to one another.
Start by making a short session clear and manageable. More minutes do not necessarily mean more learning. If an instruction is unclear, adding time can simply reinforce the same difficulty.
The introductory example below is for adults who can stand independently and steadily, have no current significant symptoms, and have not been advised to avoid this activity.
If you have a health condition, a recent injury or surgery, recurring dizziness, or difficulty standing, first ask an appropriate healthcare professional what activity is suitable for you. Written instructions cannot assess your individual health or replace personal guidance.
Notice. Adjust. Check in. Build on what you learn.
Beginning with lived experience
Notice. Where do you tend to tense? Are you controlling your breath? Can you comfortably manage the effort?
Adjust. Change one thing at a time: your hand position, stance, session length, or the way you are interpreting an instruction.
Check in. What feels different after practice? How do you feel later that day and the next morning?
Build on it. Use that feedback to guide the next session. Finding what works is an ongoing conversation between instruction and experience.
The first thing you might notice
What we also want to understand
The posture looks like the demonstration.
Does it suit this person and allow the body to work together?
The student stood for a long time.
Was the effort manageable? How did they feel afterward?
The student stayed still.
Were they attentive, able to adjust, and breathing naturally?
The student felt something unusual.
Do they understand the method without chasing that feeling?
The student remembers the instructions.
Can they put the principles into practice and use them in daily life?
A teacher looks for the adjustment that matters now. You try it and notice the difference. “Relax your whole body” may sound helpful, but it often needs to become something specific: lower the hands a little, ease the fingers, or stop lifting the shoulders.
01
Observe
Notice tension, breathing and whether the load is manageable.
02
Adjust
Adjust one thing: hand position, stance, duration or intention.
03
Listen
Notice the response afterward and the following day.
04
Refine
Let your response guide the next session.
03 / Learn Zhan Zhuang
Guidance that starts with you
The details of a person’s experience matter
Practicing together
Good teaching responds to a particular person and a particular question. When we share examples of individual guidance, we will include that context and obtain the student’s permission. We have not published individual case studies here yet.
What a useful teaching record includes
What the student wanted help with
What the teacher noticed
What they changed
How the student described the response
What they planned to observe next
An example can help explain the teaching process. It cannot tell everyone else what they should feel, and it does not replace medical advice.
04 / Learn Zhan Zhuang
Try a short introduction
Settle into the posture. Breathe normally. Adjust as needed.
Learning through individual guidance
An eight-minute introduction
This example includes preparation, a break, and a short note at the end. You stand in the practice posture for two periods of about two minutes. Those times are a guide, not a minimum you have to reach. Stop sooner if you cannot maintain the posture comfortably.
Get ready — 1 minute. Stand steadily with your feet about shoulder-width apart, facing forward. Soften your knees slightly and let your arms hang.
First round — 2 minutes. Hold your hands low in front of your lower abdomen, palms up and fingers facing each other. Keep space in your shoulders and elbows.
Take a break — 1 minute. Lower your hands. Stand normally, walk gently, or sit down.
Second round — 2 minutes. Return to the same posture. Keep it shorter if needed.
Finish — 1 minute. Lower your hands and ease back into ordinary movement.
Make a note — 1 minute. Record how long you actually practiced, one question, and one adjustment.
The low supporting hold
Keep your hands below your navel, palms up, with your fingertips facing each other and elbows bent. Leave an open curve through the arms. A traditional guideline is a gap of about three fist-widths between your hands. Adjust it to your own proportions rather than treating it as an exact measurement.
Avoid pressing your hands against your abdomen or reaching far forward. Leave a little space under your arms without clamping your elbows to your ribs or lifting them out to the sides.
Resting the hands lightly
With your hands in front of your navel, turn your palms down and slightly outward. Let your fingers point diagonally forward, gently separated and curved. Keep your shoulders down and your elbows unlocked.
Imagine resting your hands lightly on balls floating in water, without pushing them under. This image gives your intention a gentle direction. If it makes you brace your chest or press down, set it aside and return to the simple hand position.
The embracing hold
Bring your arms to a low chest-height position, palms facing inward, with space between them. Keep your elbows bent and a little lower than your hands. The traditional cue of about one chi—roughly a foot—between hands and chest is a starting guide, not a fixed distance for every body.
Keep your hands soft. Avoid forcing your elbows outward or shrugging your shoulders. Begin with a gently rounded shape rather than trying to generate force.
Feet, knees, and hips
Notice whether you are gripping with your toes or bracing your calves. Let your toes rest naturally. Soften your knees just enough to unlock them; you do not need a deep squat.
To explore the movement, place your hands briefly on your hips. Make a very small motion as if starting to sit: bend your knees and hips together, let your pelvis move a little backward, then return. Keep it small and comfortable.
Head, torso, shoulders, and arms
If your head is reaching forward, gently bring it back over your torso. Avoid forcing your chin in or stretching upward. You do not need to lift your chest or deliberately round your back.
If you are unsure whether you are holding your breath, saying a short sentence normally may help you notice. When your shoulders or arms get tired, lower them. Trying to force relaxation while you keep straining usually makes the instruction harder to understand.
Let your next breath happen
Stand normally or sit on a stable chair, with your arms resting and your eyes looking ahead. Let your breathing continue from where it is. You do not need a big opening breath or a special abdominal position.
For about a minute, notice what you try to add: a deeper inhale, a pause, or an effort to send the breath downward. Ease off that extra action. Gently return your attention to your feet or the contact of your hands with your thighs.
A small experiment with effort
In a low hold you already know, check whether your fingers are stretched rigidly straight. Soften that extra effort while keeping the hand position, palm direction, and bend in your elbows. Try this briefly—perhaps 20 to 30 seconds—then lower your hands.
Your fingers can do less without the whole posture falling apart. That is a small, practical way to explore the difference between support and unnecessary tension.
A few notes are enough: what you did, how you felt afterward, and how you felt later. Over time, they can help you see which adjustments are useful.
Date
Before practice
Posture and actual time
Question or adjustment
After practice
The next day
Seated and lying options
Wang Xiangzhai’s yangsheng writings include seated and lying practice as well as standing. These are ways to adapt to different circumstances, not lower levels of achievement.
Seated: Choose a stable chair. Rest your feet on the floor, with your knees at roughly a right angle. Place your hands on your thighs and let your shoulders and elbows settle.
Lying down: Use a surface where you can normally lie comfortably on your back, with suitable support for your head and neck. Let your legs rest naturally. Keep your arms beside you or rest your hands lightly over your lower abdomen. Ask for individual advice if these positions are unsuitable for you.
Finish without rushing
Lower your hands gradually. Return to ordinary standing without snapping your knees straight. Take a moment to notice your arms, fingers, and breathing.
Then walk a few steps within your usual ability and gently move your fingers and shoulders. You do not need to shake hard, stamp your feet, or twist your knees.
If your hands feel warm, consider the room temperature, hand position, and length of the session. If your shoulders ache, look at how high you held your arms, for how long, and whether you were bracing.
Feeling light does not prove advanced skill. Feeling heavy does not necessarily mean you are well grounded. You do not need to turn every sensation into a verdict on your progress.
Change one thing at a time
A difficulty may come from reaching too far, staying too long, or misunderstanding an instruction. It is not a judgment of your sincerity.
Return to something simpler and work on the clearest issue first. Trying every correction at once makes it hard to tell what helped. Stop for concerning symptoms rather than treating them as something to push through.
Build familiarity before adding more
Progress can mean starting and finishing more steadily, recognizing tension sooner, or knowing when to shorten a session. Minutes on the clock are only one part of the picture.
Let a manageable practice become familiar. Longer sessions need their own careful judgment. Over time, the ability to adapt matters more than hitting a fixed target.
07 / Learn Zhan Zhuang
Ways to learn
Get the information you need before signing up
A student practicing
Start with the safety notes, beginner’s introduction, and blank practice journal. Then contact our assistant to discuss what would be useful for you.
Getting started: Understand the principles and learn a basic posture.
Building a foundation: Develop your own practice with guidance and feedback.
Practicing together: Join teacher- or assistant-led sessions and ask questions.
Learning in person: Ask about teaching at the courtyard and group visits.
Our assistant will confirm what is currently available, including dates, locations, fees, and what is included. If you are outside China, share your preferred language and time zone so we can check suitable options and English-language support.
Before you join
Read the safety information.
Tell us about your experience and what you would like help with.
Discuss the learning options that fit your circumstances.
Confirm the language, time, location, fees, and included services.
Decide whether it is right for you.
Fees should be clear before you commit. Teaching is not tied to buying supplements, and we do not promise medical results.